Diving Game Air Management: When to Turn Back
A simple rule for the turn-back point, the maths behind it, and the three situations where the rule should be broken.

Every diving game on this site ends the same way: the air meter reaches zero and whatever you were carrying is gone. It is almost never because the game was unfair. It is because the decision to turn back was made a few seconds too late, and in a game where the resource drains faster the further you are from safety, a few seconds late compounds.
This guide gives you a rule for that decision, the arithmetic behind it, and the three situations where the rule should be broken. It applies directly to Ocean Treasure Hunt and Deep Sea Diver, and the thinking transfers to any game with a depleting resource.
This is about games, not diving. The air models described here are arcade timers designed for pacing. Real diving involves decompression obligations, gas physics and training that none of these games represent. Nothing in this guide is diving instruction.
How the drain actually works
The mechanic that makes these games interesting is that the drain rate is not constant — it scales with depth.
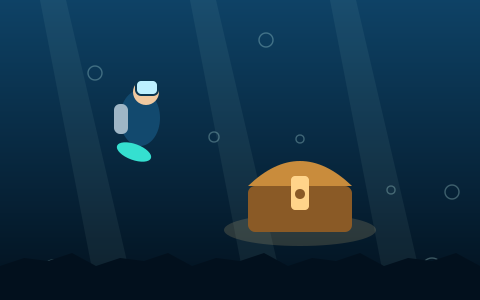
In Ocean Treasure Hunt, oxygen falls at 3.4% per second just below the surface line and 8.6% per second at the seabed. That is a two-and-a-half-times difference across the dive site. Sitting at the bottom deciding what to do costs you two and a half times as much as sitting near the top doing the same thing.
In Deep Sea Diver the drain is tied to tiers instead: 2.6% per second at the start, rising by 0.55 for every 180 metres you descend. By 700 metres you are losing well over 5% a second while simultaneously descending faster than ever.
The consequence in both games is the same and it is counter-intuitive: time spent deep is disproportionately expensive, and the expense increases exactly when you are least able to afford it.
The turn-back rule
Here is the rule. It is simple enough to apply in real time, which is the only kind of rule that is any use in an arcade game.
Turn back when the air you have left is less than the cost of the swim home, plus a third.
The plus-a-third is the part players skip, and it is the part that matters. It covers everything you cannot plan: a hazard knocking you sideways, a misjudged distance, the carrying penalty being heavier than you remembered, or simply steering badly under pressure.
Divers who turn back at exactly break-even drown regularly, because break-even assumes a perfect ascent. Divers who add a margin almost never do.
Working out the cost of the swim home
You do not need to calculate this mid-run — you need to have calculated it once, so that the shape of it is intuitive.
Take Ocean Treasure Hunt. The dive site is about two and a half screens deep. From the seabed, a clean unloaded ascent takes roughly four to five seconds. Carrying three chests, the diver is about 39% slower and noticeably heavier, so the same ascent takes closer to seven or eight.
At a drain rate that averages perhaps 6% per second across that ascent, a loaded swim from the bottom costs somewhere around 45% of your air. Add the third and you get a working threshold: from the seabed with a full load, turn back at about 60%.
From halfway up, the same arithmetic gives you roughly 30%. From just under the safe zone, almost anything is survivable.
The depth gauge on the right edge of the stage exists precisely so you can make this judgement at a glance rather than guessing.
Why the third chest is usually wrong
Ocean Treasure Hunt lets you carry three chests and charges you for each one: every chest makes the diver about 13% slower and adds weight that fights your ascent.
So the third chest is not just "one more chest". It is one more chest plus a slower, heavier return trip applied to the whole journey home — the longest and most expensive part of the dive.
Run the comparison. A chest near the seabed is worth around 110 points. Banking two chests and immediately diving again typically costs less total time than hauling three, because the second dive starts with full air from the surface refill. And the failure modes are not symmetrical: over-reaching for a third chest and drowning costs you all three, not one.
The default should be two. Take the third only when it is genuinely close to your route and you are above your turn-back threshold with margin to spare.
Treating hazards as a price, not a threat
Neither game can kill you with a hazard. In Ocean Treasure Hunt an urchin costs 11% of your oxygen and pushes you away; in Deep Sea Diver a kelp knot or urchin costs 14%, with a two-second cooldown so you cannot be drained instantly.
That changes how you should think about them. A hazard is not something to avoid at all costs — it is a toll, and tolls can be worth paying.
Concretely: in Deep Sea Diver, a hazard costs 14% and an air pocket restores 26%. If the only route to an air pocket passes through a kelp knot, going straight through is net positive by 12%, and it is faster than the detour. Players who reflexively avoid every hazard routinely drown twenty metres above air they could have reached.
In Ocean Treasure Hunt, 11% of oxygen is roughly two seconds of deep-water time. If going around an urchin costs more than two seconds, go through it.
The Deep Sea Diver supply problem
Deep Sea Diver deserves its own section because its difficulty curve is a supply problem rather than a skill problem.
The chance that any given item is an air pocket starts at 42% and falls by 2.8 percentage points per tier, bottoming out at 14%. Meanwhile the drain rate rises and the descent speeds up. Put together: the deeper you are, the more of the screen you must cover per air pocket, with less time to cover it.
Three things follow.
Below about 400 metres, stop collecting pearls. A pearl is worth 20 points plus 5 per tier. Missing an air pocket because you detoured for a pearl costs you every point you would have earned from the next several hundred metres. The maths is not close.
Use the brake. Holding up drops your descent to 42% of normal. It exists so you can line up an air pocket that is not directly beneath you, and it is the most under-used control in the library. Kicking past the air you needed is the most common way a promising run ends.
Kick between pickups, not through them. The efficient rhythm is: power-kick through empty water, brake into each pickup, kick again. Constant maximum speed produces more depth per second and less depth per run.
When to break the rule
Three situations justify pushing past your threshold.
A level-up refill is in reach. In Ocean Treasure Hunt, clearing a depth level restores your air completely. If banking what you carry will cross the level target, the ascent effectively costs nothing, so a riskier return is correct.
The air is below you, not above. In Deep Sea Diver there is no "back" — you only go down. If the next air pocket is below and to the left, the only wrong move is hesitating. The turn-back rule simply does not apply to a game without an ascent.
You are already losing. If the run is over anyway, an aggressive gamble costs nothing. This is a legitimate strategy at the end of a bad run and a terrible habit at the start of a good one.
Two drills
The two-chest drill. Ten runs of Ocean Treasure Hunt where you never carry more than two chests, no exceptions. Compare your average score against your previous ten. Most players find the two-chest average higher, which is usually the moment the point lands.
The brake drill. One run of Deep Sea Diver where you hold the brake whenever an air pocket is on screen and not directly below you. Your depth per second will drop and your total depth will rise.
Key takeaways
- Air drains faster with depth — 3.4% to 8.6% per second in Ocean Treasure Hunt.
- Turn back when your remaining air is less than the swim home plus a third.
- From the seabed with a full load, that threshold is around 60%.
- Two chests is usually better than three: the carry penalty applies to the whole ascent.
- Hazards are a price, not a threat. A 14% hazard on the way to a 26% air pocket is worth taking.
- In Deep Sea Diver, stop collecting pearls past about 400 metres and use the brake.
- Value you have not banked is worth zero.
Frequently asked questions
Why did I score nothing after collecting three chests?
Chests only score when you carry them above the dashed surface line. Running out of air while loaded banks nothing at all. That is the central risk of the game and the reason the carry limit exists.
How fast does air refill at the surface?
In Ocean Treasure Hunt, 42% per second above the surface line, so a full recharge from empty takes a little over two seconds. Banking happens automatically the moment you cross the line.
Can hazards end a dive by themselves?
No. In both games hazards cost air and apply knockback but cannot end the run directly. Only an empty air meter ends a dive, and nothing in either game depicts injury.
Is it ever right to take three chests?
Yes, when the third is close to your existing route and you are comfortably above your turn-back threshold, or when banking the load will clear the level target and trigger a full air refill. As a default it is the wrong call.
Does Deep Sea Diver have a bottom?
No. The descent is endless and the air-pocket rate bottoms out at 14% rather than reaching zero, so depth is limited by how efficiently you find air rather than by a floor.
Does any of this reflect real diving practice?
No. Real diving involves decompression limits, gas management, ascent rate limits and buddy procedures that these games do not model at all. The rule in this guide is an arcade heuristic for arcade air meters.
Where to go next
The routing side of the same problem is covered in the exploration strategy guide — deciding which chest to go for is a different skill from deciding when to leave. For the design thinking behind the mechanic, read underwater treasure games and the risk–reward loop, and for the wider category, the diving games page lists everything.